Credit Card with OCR Scanner in React Native

Building an Interactive Credit Card with OCR Scanner in React Native
How I built a beautiful, animated credit card component with real-time scanning capabilities - and how you can too.
The Problem
We've all been there - manually typing in credit card numbers on mobile apps. One wrong digit and you're starting over. What if users could just point their camera at their card and automatically fill in all the details?
That's exactly what I set out to build, and along the way, I learned a ton about React Native animations, OCR integration, and creating truly delightful user experiences.
What We're Building
I'll show you how to create an interactive credit card component that:
- ✨ Flips with smooth animations (just like a real card!)
- 📷 Scans real credit cards using your phone's camera
- 🎨 Automatically detects card types (Visa, Mastercard, Amex, etc.)
- ✏️ Lets you edit any field with a simple tap
- 📱 Works beautifully on iOS, Android, and even web
Here's the cool part - it's way easier than you think.
The Tech Stack
We'll be using:
- React Native & Expo - For cross-platform development
- React Native Animated API - For smooth animations
- expo-camera - For accessing the device camera
- OCR.space API - For reading text from images (free tier available!)
Don't worry if you haven't used these before - I'll walk you through everything.
Quick Start
You'll need Node.js and Expo CLI installed. If you don't have them:
npm install -g expo-cli
Then clone and run the project:
git clone https://github.com/yourusername/CreditCardApp.git
cd CreditCardApp
npm install
npm start
Scan the QR code with Expo Go (iOS/Android) or press w to open in browser. That's it!
How It Works: The Magic Behind the Scenes
Part 1: Creating the Credit Card
The first challenge was making a card that feels real. I wanted that satisfying flip animation you get with a physical card.
Here's the foundation:
const CreditCard = forwardRef((props, ref) => {
const [cardData, setCardData] = useState({
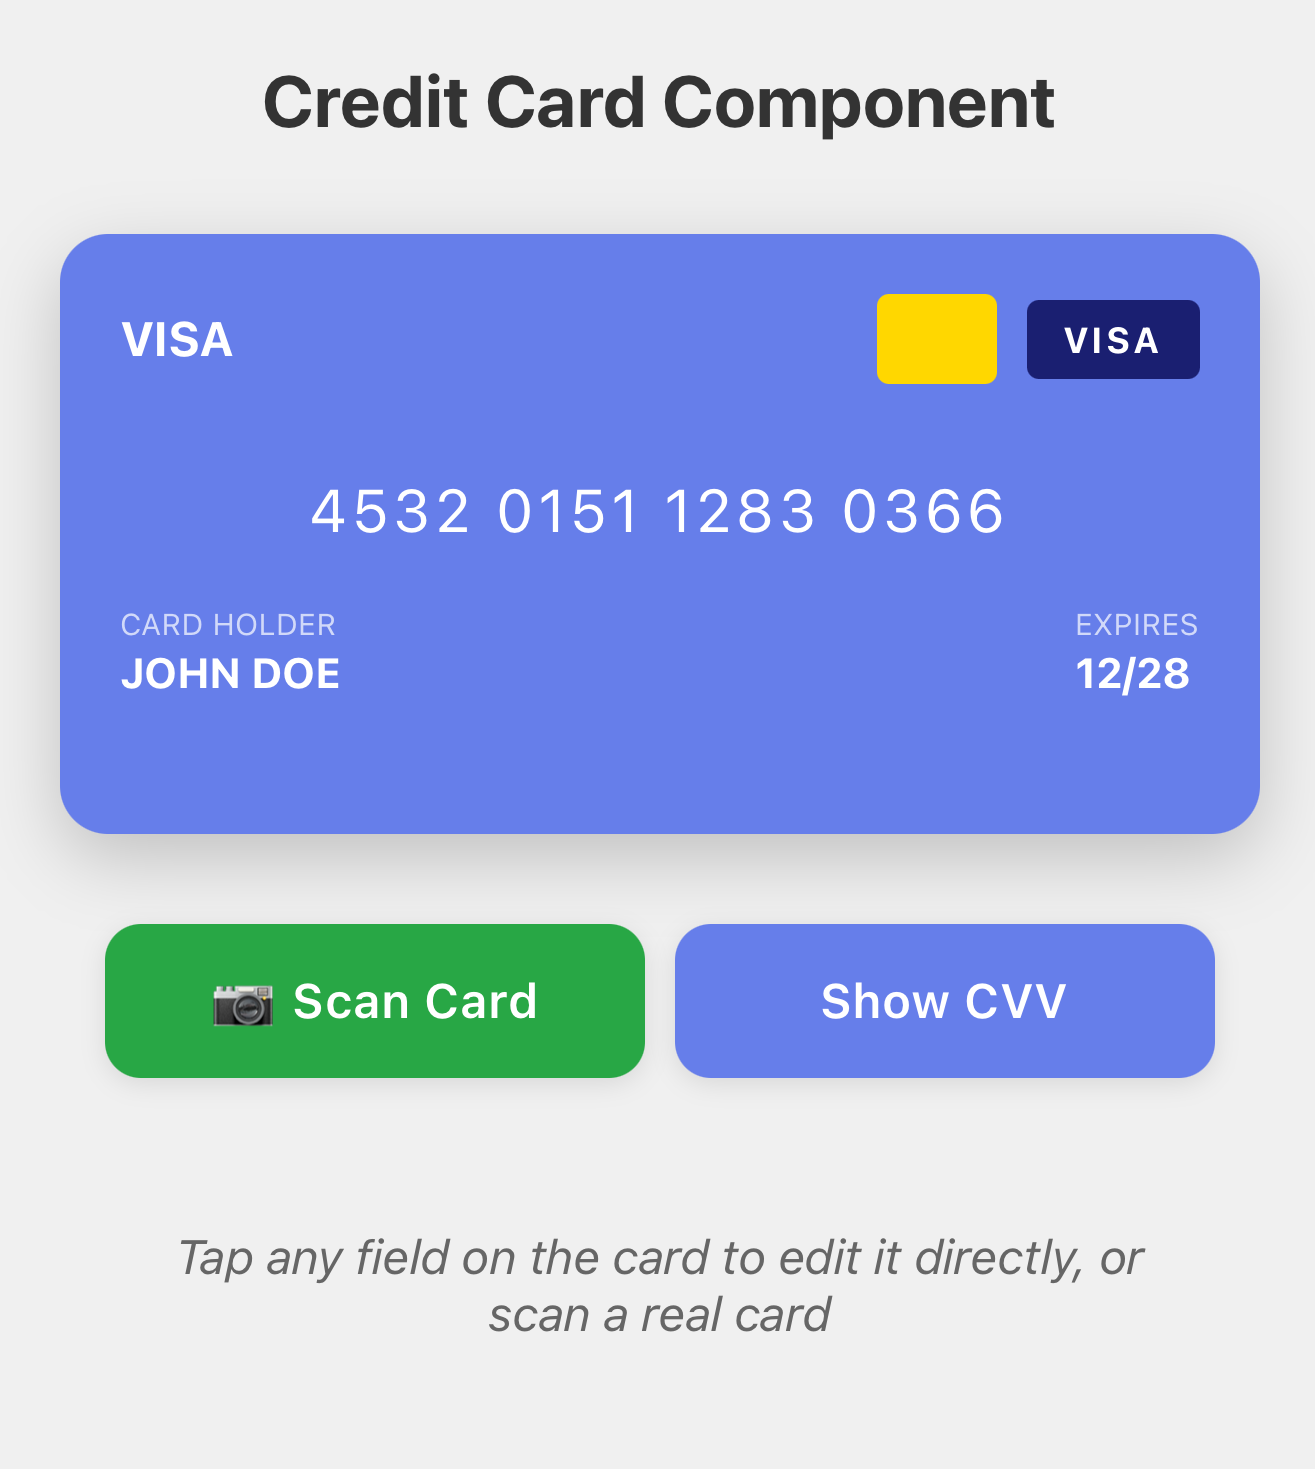
number: '4532 0151 1283 0366',
name: 'JOHN DOE',
expiry: '12/28',
cvv: '123',
});
const flipAnimation = useRef(new Animated.Value(0)).current;
// Expose methods so the camera scanner can update our card
useImperativeHandle(ref, () => ({
flipCard,
updateCardData
}));
});
The trick is using forwardRef - this lets the camera scanner talk to our card component and update it with scanned data. Think of it as giving the scanner a remote control for the card.
Part 2: The Flip Animation
Here's where it gets fun. The animation needs to feel smooth and natural - like flipping a real card.
const flipCard = () => {
    Animated.timing(flipAnimation, {
        toValue: isFlipped ? 0 : 1,
        duration: 600,
        useNativeDriver: true,  // This is crucial for smooth 60fps!
        easing: Easing.out(Easing.cubic),
    }).start();
};

// Map animation value (0 to 1) to rotation degrees
const frontInterpolate = flipAnimation.interpolate({
    inputRange: [0, 1],
    outputRange: ['0deg', '180deg'],
});

const backInterpolate = flipAnimation.interpolate({
    inputRange: [0, 1],
    outputRange: ['180deg', '360deg'],
});
The secret sauce? useNativeDriver: true - this runs the animation on the native thread instead of the JavaScript thread, giving you buttery smooth 60fps performance even on older devices.
Part 3: The Camera Scanner (This Was the Fun Part!)
The coolest feature is definitely the OCR scanner. Point your camera at a credit card, and boom - all the details are extracted automatically.
I used the free OCR.space API (25,000 requests/month on free tier - plenty for most apps):
const extractCardDataFromImage = async (imageUri) => {
    // Convert image to base64
    const base64 = await FileSystem.readAsStringAsync(imageUri, {
        encoding: FileSystem.EncodingType.Base64,
    });

    // Send to OCR.space
    const response = await fetch('https://api.ocr.space/parse/image', {
        method: 'POST',
        headers: { 'apikey': 'YOUR_API_KEY' },
        body: formData,
    });

    const text = response.ParsedResults[0].ParsedText;
    return parseCardData(text);
};
The tricky part? Parsing the recognized text. Credit cards don't have a standard layout, so I use regex patterns to find the card number, expiry date, and name:
// Find 16-digit card numbers
const cardNumberRegex = /\b(?:\d{4}[\s-]?){3}\d{4}\b/;

// Find MM/YY expiry dates
const expiryRegex = /\b(0[1-9]|1[0-2])[\s\/\-]?(\d{2})\b/;

// Find cardholder name (longest alphabetic string that's not "VISA" or "MASTERCARD")
const nameRegex = /^[A-Z\s]{5,}$/;
Pro tip: Always provide a manual entry fallback! OCR isn't perfect, especially in poor lighting.
Part 4: Auto-Detecting Card Types
One neat detail - the card automatically knows if it's a Visa, Mastercard, Amex, etc., just from the first few digits:
const detectCardType = (number) => {
    const cleaned = number.replace(/\s/g, '');

    if (/^4/.test(cleaned)) return 'visa';           // Visa starts with 4
    if (/^5[1-5]/.test(cleaned)) return 'mastercard'; // Mastercard: 51-55
    if (/^3[47]/.test(cleaned)) return 'amex';        // Amex: 34 or 37
    if (/^6011/.test(cleaned)) return 'discover';     // Discover: 6011

    return 'unknown';
};
The card then displays the right logo and brand colors automatically. Little touches like this make the experience feel polished.
Putting It All Together
Here's how you use it in your app:
import CreditCard from './components/CreditCard';
import SimpleCreditCardScanner from './components/SimpleCreditCardScanner';
import { useState, useRef } from 'react';

export default function App() {
    const [showScanner, setShowScanner] = useState(false);
    const creditCardRef = useRef(null);

    const handleCardDataScanned = (scannedData) => {
        creditCardRef.current.updateCardData(scannedData);
        setShowScanner(false);
    };

    return (
        <View>
            <CreditCard ref={creditCardRef} />

            <Button title="📷 Scan Card" onPress={() => setShowScanner(true)} />
            <Button title="Flip Card" onPress={() => creditCardRef.current.flipCard()} />

            <SimpleCreditCardScanner
                visible={showScanner}
                onClose={() => setShowScanner(false)}
                onCardDataScanned={handleCardDataScanned}
            />
        </View>
    );
}
That's literally it. The component handles everything else - animations, formatting, validation, you name it.
Things I Learned Along the Way
1. OCR Isn't Perfect (And That's Okay)
In good lighting with a clean card, OCR works great - about 80-90% success rate. But poor lighting? Worn cards? Forget it. That's why the manual entry fallback is crucial. Never trust OCR alone.
2. Animation Performance Matters
Initially, I didn't use useNativeDriver: true for the flip animation. Big mistake. The animation was choppy on older devices. Adding that one line made it buttery smooth on everything.
3. Card Formats Are Weird
Did you know American Express cards have a different format? 15 digits instead of 16, formatted as 4-6-5 instead of 4-4-4-4. These edge cases matter for a polished experience.
Want to Customize It?
The component is super flexible. Want different colors? Change the gradient in CreditCard.js:
cardFront: {
    backgroundColor: '#FF6B6B', // Coral red instead of purple
}
Want faster animations? Adjust the duration:
Animated.timing(flipAnimation, {
    duration: 400,  // Snappier than default 600ms
    // ... rest of config
});
You can customize literally everything - colors, sizes, fonts, animation speeds, card logos. The code is well-commented and easy to modify.
Important: Security Note
⚠️ This is a demo/educational project. The app uses test card numbers only.
If you're building a real payment app:
- Never store actual card data on the device
- Use payment processors like Stripe, Square, or Braintree
- These services tokenize cards so you never touch sensitive data
- Always follow PCI DSS compliance standards
Seriously, don't roll your own payment security. Use the pros.
Common Issues
Camera not working?
- iOS simulator doesn't support camera - use a real device
- Make sure you granted camera permissions when prompted
OCR not detecting cards?
- Try better lighting
- Clean your card (no glare or reflections)
- Use the manual entry fallback - it's there for a reason!
Animation choppy?
- Make sure
useNativeDriver: trueis set - Test on a real device (simulators are often slow)
App won't start?
npx expo start -c # Clear cache
Ideas for Extension
Some cool features you could add:
- Multiple card management - Save and switch between cards
- Stripe/Square integration - Actually process payments (with proper tokenization!)
- Card themes - Let users pick different card designs
- Haptic feedback - Add a subtle vibration on flip
- Dark mode - Because everyone loves dark mode
- Luhn validation - Validate card numbers mathematically
- QR code scanning - Alternative input method
The possibilities are endless!
Want to Contribute?
Found a bug? Have an improvement? Pull requests are welcome!
- Fork the repo
- Create your feature branch (
git checkout -b feature/cool-feature) - Commit your changes
- Push and open a pull request
Or just star the repo if you found it useful ⭐
Wrapping Up
Building this was a fun journey into React Native animations and OCR integration. The key takeaways:
- Smooth animations require
useNativeDriver: true - OCR is cool but imperfect - always have a fallback
- Small details matter - card type detection, auto-formatting, etc.
- Security first - never store real card data, use proper payment processors
The complete code is on GitHub. Feel free to use it, modify it, or learn from it. If you build something cool with it, I'd love to see it!
License
MIT License - use it however you want, just don't blame me if something breaks 😄
Built with ❤️ by TTC
⭐ Star the repo if you found this useful!
📧 Questions? Open an issue on GitHub or reach out.
Last Updated: October 27, 2025
Need help building your mobile app?
Let's talk about how we can help you design, build, and scale a high-performance React Native app tailored to your users.
Talk to an Expert